
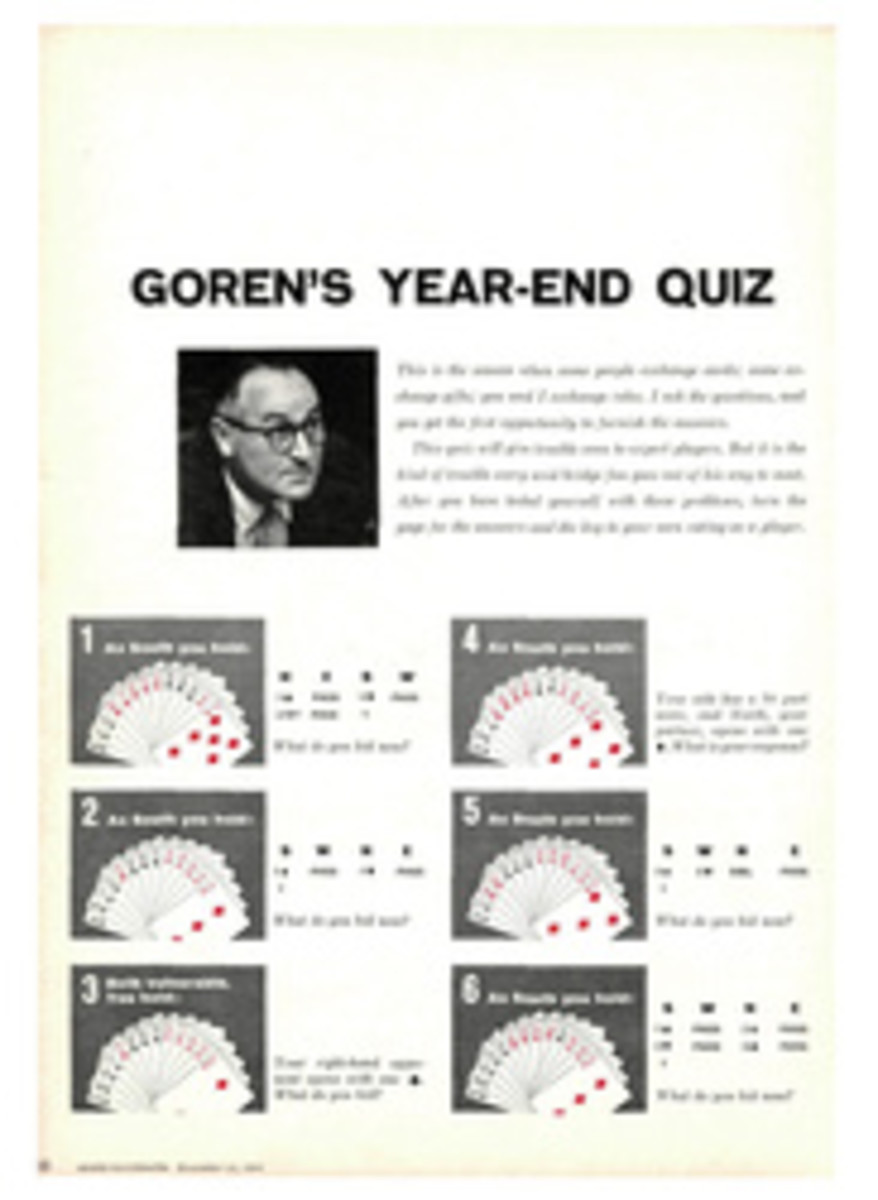
GOREN'S YEAR-END QUIZ
This is the season when some people exchange cards; some exchange gifts; you and I exchange roles. I ask the questions, and you get the first opportunity to furnish the answers.
This quiz will give trouble even to expert players. But it is the kind of trouble every avid bridge fan goes out of his way to meet. After you have tested yourself with these problems, turn the page for the answers and the key to your own rating as a player.
1 As South you hold:
[Queen of Spades]
[Jack of Spades]
[4 of Spades]
[King of Hearts]
[7 of Hearts]
[6 of Hearts]
[5 of Hearts]
[4 of Hearts]
[King of Clubs]
[Queen of Clubs]
[10 of Clubs]
[Ace of Diamonds]
[7 of Diamonds]
N
1 [Club]
2 NT
E
PASS
PASS
S
1 [Heart]
?
W
PASS
What do you bid now?
2 As South you hold:
[Ace of Spades]
[King of Spades]
[7 of Spades]
[2 of Spades]
[5 of Hearts]
[King of Clubs]
[10 of Clubs]
[5 of Clubs]
[Ace of Diamonds]
[King of Diamonds]
[6 of Diamonds]
[4 of Diamonds]
[3 of Diamonds]
S
1 [Diamond]
?
W
PASS
N
1 [Heart]
E
PASS
What do you bid now?
3 Both vulnerable. You hold:
[King of Spades]
[Queen of Spades]
[10 of Spades]
[7 of Spades]
[7 of Hearts]
[King of Clubs]
[6 of Clubs]
[3 of Clubs]
[Ace of Diamonds]
[Jack of Diamonds]
[6 of Diamonds]
[3 of Diamonds]
[2 of Diamonds]
Your right-hand opponent opens with one [Spade]. What do you bid?
4 As South you hold:
[King of Spades]
[Queen of Spades]
[7 of Spades]
[Ace of Hearts]
[Queen of Hearts]
[10 of Hearts]
[8 of Hearts]
[Ace of Clubs]
[9 of Clubs]
[Ace of Diamonds]
[Queen of Diamonds]
[Jack of Diamonds]
[6 of Diamonds]
Your side has a 70 part score, and North, your partner, opens with one [Diamond]. What is your response?
5 As South you hold:
[8 of Spades]
[5 of Spades]
[10 of Hearts]
[4 of Hearts]
[9 of Clubs]
[5 of Clubs]
[2 of Clubs]
[Ace of Diamonds]
[King of Diamonds]
[Queen of Diamonds]
[Jack of Diamonds]
[9 of Diamonds]
[5 of Diamonds]
S
3 [Diamond]
?
W
3 [Heart]
N
DBL
E
PASS
What do you bid now?
6 As South you hold:
[King of Spades]
[Queen of Spades]
[10 of Spades]
[5 of Spades]
[4 of Spades]
[Ace of Hearts]
[10 of Hearts]
[9 of Hearts]
[4 of Hearts]
[4 of Clubs]
[King of Diamonds]
[10 of Diamonds]
[3 of Diamonds]
S
1 [Spade]
2 [Heart]
?
W
PASS
PASS
N
2 [Diamond]
3 [Club]
E
PASS
PASS
What do you bid now?
7 Both vulnerable. As South you hold:
[Ace of Spades]
[Jack of Spades]
[10 of Spades]
[7 of Spades]
[5 of Spades]
[4 of Spades]
[3 of Spades]
[Jack of Hearts]
[9 of Hearts]
[King of Clubs]
[Jack of Clubs]
[4 of Clubs]
[3 of Diamonds]
N
1 [Club]
PASS
DBL
E
DBL
PASS
2 NT
S
REDBL
1 [Spade]
?
W
1 [Heart]
2 [Heart]
What do you bid now?
8 As South you hold:
[Jack of Spades]
[7 of Spades]
[5 of Spades]
[3 of Spades]
[Ace of Hearts]
[King of Hearts]
[Queen of Hearts]
[Ace of Clubs]
[Queen of Clubs]
[9 of Clubs]
[8 of Clubs]
[5 of Clubs]
[2 of Clubs]
E
1 [Diamond]
PASS
PASS
S
DBL
DBL
?
W
2 [Diamond]
PASS
N
PASS
2 [Heart]
What do you bid now?
9 As South you hold:
[9 of Spades]
[7 of Spades]
[9 of Hearts]
[6 of Hearts]
[Ace of Clubs]
[King of Clubs]
[Queen of Clubs]
[10 of Clubs]
[Queen of Diamonds]
[10 of Diamonds]
[7 of Diamonds]
[5 of Diamonds]
[3 of Diamonds]
N
1 [Spade]
4 [Diamond]
E
PASS
PASS
S
2 [Diamond]
?
W
PASS
What do you bid now?
10 With 60 on game. As South you hold:
[King of Spades]
[Queen of Spades]
[9 of Spades]
[Ace of Hearts]
[Queen of Hearts]
[9 of Hearts]
[Jack of Clubs]
[9 of Clubs]
[3 of Clubs]
[Ace of Diamonds]
[Queen of Diamonds]
[6 of Diamonds]
[4 of Diamonds]
E
1 [Club]
PASS
PASS
PASS
S
DBL
DBL
PASS
?
W
1 NT
PASS
2 [Spade]
N
PASS
2 [Heart]
PASS
What do you bid now?
11 As South you hold:
[Jack of Spades]
[9 of Spades]
[King of Hearts]
[10 of Hearts]
[9 of Hearts]
[8 of Hearts]
[4 of Hearts]
[3 of Hearts]
[Ace of Clubs]
[King of Clubs]
[3 of Clubs]
[Ace of Diamonds]
[2 of Diamonds]
Your right-hand opponent opens with three [Heart]. What do you bid?
12 As South you hold:
[King of Spades]
[9 of Spades]
[Ace of Hearts]
[Queen of Hearts]
[7 of Hearts]
[Ace of Clubs]
[9 of Clubs]
[7 of Clubs]
[6 of Clubs]
[Ace of Diamonds]
[Jack of Diamonds]
[8 of Diamonds]
[4 of Diamonds]
E
1 [Heart]
PASS
S
1 NT
?
W
PASS
N
3 [Club]
What do you bid now?
13 As South you hold:
[2 of Spades]
[King of Hearts]
[10 of Hearts]
[9 of Hearts]
[8 of Hearts]
[Jack of Clubs]
[9 of Clubs]
[2 of Clubs]
[Queen of Diamonds]
[Jack of Diamonds]
[8 of Diamonds]
[7 of Diamonds]
[3 of Diamonds]
N
1 [Club]
DBL
E
3 [Spade]
4 [Spade]
S
PASS
?
W
PASS
What do you bid now?
14 As South you hold:
[Ace of Spades]
[King of Spades]
[Queen of Spades]
[3 of Spades]
[2 of Spades]
[Ace of Hearts]
[2 of Hearts]
[King of Clubs]
[Queen of Clubs]
[Jack of Clubs]
[Ace of Diamonds]
[Queen of Diamonds]
[Jack of Diamonds]
S
2 [Spade]
?
W
PASS
N
4 [Spade]
E
PASS
What do you bid now?
15 As South you hold:
[Ace of Spades]
[9 of Spades]
[5 of Spades]
[2 of Spades]
[King of Hearts]
[7 of Hearts]
[5 of Hearts]
[Ace of Clubs]
[Queen of Clubs]
[Jack of Clubs]
[6 of Clubs]
[Ace of Diamonds]
[King of Diamonds]
S
1 [Club]
?
W
PASS
N
1 [Spade]
E
PASS
What do you bid now?
16 As South you hold:
[2 of Spades]
[Ace of Hearts]
[King of Hearts]
[Jack of Hearts]
[5 of Hearts]
[Queen of Clubs]
[Jack of Clubs]
[10 of Clubs]
[9 of Clubs]
[King of Diamonds]
[Queen of Diamonds]
[Jack of Diamonds]
[4 of Diamonds]
N
PASS
PASS
E
1 [Spade]
PASS
S
DBL
W
PASS
What do you lead?
17 As West you hold:
[Queen of Spades]
[Jack of Spades]
[10 of Spades]
[6 of Spades]
[4 of Spades]
[2 of Hearts]
[Queen of Clubs]
[Jack of Clubs]
[10 of Clubs]
[9 of Clubs]
[8 of Diamonds]
[7 of Diamonds]
[6 of Diamonds]
S
1 [Diamond]
2 NT
PASS
W
PASS
PASS
PASS
N
2 [Club]
3 NT
PASS
E
2 [Heart]
DBL
What do you lead?
18 The contract is six [Heart]. South leads 8 [Diamond].
WEST
[Ace of Spades]
[Jack of Spades]
[10 of Spades]
[9 of Spades]
[5 of Spades]
[King of Hearts]
[10 of Hearts]
[4 of Hearts]
[Ace of Clubs]
[Queen of Clubs]
[Queen of Diamonds]
[Jack of Diamonds]
[3 of Diamonds]
EAST
[King of Spades]
[7 of Spades]
[6 of Spades]
[Ace of Hearts]
[Queen of Hearts]
[Jack of Hearts]
[9 of Hearts]
[6 of Hearts]
[3 of Hearts]
[5 of Clubs]
[King of Diamonds]
[10 of Diamonds]
[9 of Diamonds]
North's A [Diamond] takes first trick. You win his return [Diamond] lead. How do you play your slam?
HERE ARE THE ANSWERS
Awards for the various bids range from 5 points down to 0. Similar awards have been made for the problems in play.
1
Six no trump 5 points
Three clubs 2 points
Five no trump 1 point
Four no trump 0
You have a good opening bid, plus a shade to spare. Since partner has opened and jumped, there should be a slam. That is all you need to know. A no-trump contract suits your hand, so there is nothing further to do than to utter the words "six no trump." As a check, refer to the point count. You have 15 points. Partner has at least 19, with some sort of fit. The total of 34 is convincing enough for slam. Other calls merit little credit, and a bid of four no trump receives none at all. It need hardly be pointed out that on this sequence of bidding it is a no-trump raise, not the Blackwood convention.
2
One spade 5 points
Three diamonds 3 points
Two no trump 2 points
Two spades 1 point
Two diamonds 0
There is no reason for undue excitement. If partner's hand is predominantly hearts, you will have nothing to cheer about.
Take it easy with a simple rebid of one spade. It is true that such a bid is not absolutely forcing, but if your partner elects to pass you may be quite sure that you have reached the correct final contract. It should be noted that a two-no trump rebid shows 19 high-card points and is not recommended with a singleton in partner's suit.
3
Pass 5 points
Two diamonds 2 points
One no trump 1 point
Double 0
Don't crowd a fellow who might be working for you, even when he's an opponent. Give him plenty of elbow space. Any action by you that tends to impede the opposition is bound to prove to your detriment.
4
Two hearts 5 points
Six no trump or six diamonds 4 points
Four no trump 3 points
Three diamonds 0
One heart —1
(1 demerit)
To some degree, the form of action you choose depends upon the faith you have in partner. Assuming reliability—a practice which we encourage in these tests—the clear-cut response is two hearts, intending to bid at least a small slam in very short order but testing for seven. If you have some misgivings as to North's reaction to part-score situations or if, by the same line of reasoning, you feel that he may not have sufficient reliance upon you, you had better straightway contract for six no trump or six diamonds. A response of one heart rates a demerit because, inasmuch as that call completes the game, it is not forcing under the advanced part score.
5
Pass 5 points
Three no trump 2 points
Four diamonds 1 point
Five diamonds 0
There is no occasion for you to assume any further authority. You have told your story by your pre-emptive bid. In fact, you have better defensive values than partner might expect. He has undertaken to defeat the three-heart contract under his own steam and it would ill become you to adopt a mother-hen attitude. Among the other calls, three no trump has the slight merit of at least reaching for game. A contract of five diamonds, however, is sure to end in disaster.
6
Three diamonds 5 points
Three spades 3 points
Three no trump 3 points
Pass 0
Many players tend to drift into three no trump as soon as all suits have been named—a step that would be ill advised on this hand. A mere preference for three diamonds is sufficient to express your holding. Partner should then be in position to select the best final contract. A rebid of three spades might elicit a raise if partner has a doubleton honor.
7
Double 5 points
Four spades 2 points
Three clubs 1 point
Three spades 0
Be sure not to block traffic for partner. It is evident the opponents are floundering. By his penalty double of two hearts, partner has indicated that he is anxious to operate on the enemy, and you should not bid any number of spades. This would let them off the hook. Better strategy is to double two no trump. If they run to three diamonds, you can leave it to partner.
Three spades receives no credit since it is not forcing.
8
Three clubs 5 points
Three hearts 3 points
Pass 2 points
Three diamonds 1 point
Four hearts 0
Our choice of the three-club bid may savor a bit of the road hog. But there is method to what may appear to be our madness. On the surface, it seems strange to run out of a suit in which we hold the three top trump honors, but it must be recalled that partner was forced to speak and may have four small trumps. He may find it most inconvenient to have to ruff diamonds with the top trumps.
Although you have a good hand, stronger action would be unwise inasmuch as partner may have nothing.
9
Five clubs 5 points
Five diamonds 3 points
Four no trump 2 points
Six diamonds 1 point
You hold the playing strength equivalent of an opening bid facing a partner who has opened the bidding and jumped. It is appropriate that your fancy lightly turns to thoughts of slam. A bid of five clubs is a mild step in that direction; if partner does not contract for the slam, you may relax knowing you have done your duty. A bid of only five diamonds will probably end the auction; a leap directly to six is an unsound gamble.
10
Pass 5 points
Three hearts 2 points
Two no trump 1 point
Double 0
You hold a hand of considerable merit, to be sure. Do not, on that account, subject yourself to a deliberate loss. Holdings like this are apt to induce a false pride. Pause to consider your chances of making nine tricks with a poverty-stricken partner and you will see that discretion calls for a pass. You have given your all.
11
Pass 5 points
Three no trump 2 points
Double 0
One might be tempted in the circumstances to give out with some such outburst as "I double, and how!" But since such practice does not conform with our standards of propriety, this call is not available. In our methods, a double of an opening three bid is a highly cooperative bid, tending rather toward a take-out. It is a virtual certainty that your partner has no more than one heart, and probably none. He will, therefore, hold the kind of hand on which he will surely bid if you double. So why not pass and take a sure profit? Remember, there is always the slight chance that partner may have sufficient strength to make a take-out double when the bid gets around to him, in which event you will be delighted to pass.
12
Three hearts 5 points
Five clubs 3 points
Four clubs or Three diamonds 2 points
Four no trump 1 point
That East has dragged a red herring across the scene has just become apparent. If East did not stretch the truth, where did North find sufficient high-card strength to justify a jump response? In an effort to expose the gay deceiver, a cue bid of three hearts is recommended, with the intention of supporting clubs vigorously on the next round. You have more than you needed for your one no-trump bid, and the quality of your points is first-rate. Of the other calls, only the immediate jump raise approached being adequate to describe your values.
13
Five diamonds 5 points
Four no trump 4 points
Double 3 points
Five hearts or Five clubs 2 points
Pass 1 point
In view of partner's display of strength, you should regard your holding with a bullish eye. Remember, partner has asked you to bid at the level of four, fully aware that you might have nothing. Your favorable distribution and high cards in the red suits should induce strong action at this point to circumvent East's hijacking effort to silence you.
With an advanced partner, four no trump is an enlightened call, asking him to select the suit. It should be quite clear that your bid is not Blackwood inasmuch as you were able to make a free bid the first time. Nor could it express a desire to play the hand at no trump, for with adequate spades you would have doubled East. A penalty double will at least yield a greater profit than a pass, which shows complete timidity—a charge which can hardly be leveled at anyone who bid five clubs or five hearts.
14
Pass 5 points
Five spades 2 points
Six spades 0
Before you decide that your inquisitor is suffering from a fear neurosis, consider the significance of partner's four-spade response. The jump raise of an opening bid of two in a suit is a specialized bid, describing a hand which contains very good trump support but no ace, king or singleton. Therefore, it is clear that your side lacks the club ace, has a heart loser to dispose of and requires a bit of good fortune in the location of the king of diamonds. Any slam bid should be regarded as far too remote to consider.
15
Three diamonds 5 points
Four spades 4 points
Three no trump 2 points
Three spades 0
As the scale of credits indicates, it is a close choice between a jump raise to four spades and a jump shift to three diamonds—to our mind the top-drawer rebid. It will have the merit of ferreting out a possible slam on some holdings. While three no trump rates some credit, the three-spade rebid deserves nothing since it is not even forcing.
16
Spade 2 5 points
Diamond king or Club queen 2 points
Heart king 0
To justify this scale of awards, I will reveal the East-West hands:
West
[Jack of Spades]
[6 of Spades]
[3 of Spades]
[6 of Hearts]
[10 of Diamonds]
[7 of Diamonds]
[6 of Diamonds]
[5 of Diamonds]
[3 of Diamonds]
[8 of Clubs]
[6 of Clubs]
[4 of Clubs]
[2 of Clubs]
East
[Ace of Spades]
[8 of Spades]
[7 of Spades]
[6 of Spades]
[5 of Spades]
[8 of Hearts]
[7 of Hearts]
[5 of Hearts]
[4 of Hearts]
[3 of Hearts]
[Ace of Diamonds]
[Ace of Clubs]
[King of Clubs]
If you open the king of hearts, a trump shift is too late. Declarer wins with the ace, ruffs a second heart in dummy, gets back with a club, ruffs a second heart and comes back with another club. He gives South a high heart, but on the club return he ruffs and leads his fifth heart, insuring that he will make contract with an overtrick.
Open the trump, however, and before East can ruff any hearts, North will get in and draw West's remaining trumps, insuring a two-trick set.
Whenever partner has doubled a low contract or left in a take-out double he calls for a trump lead.
17
Heart 5 points
Spade queen or Club queen 1 point
Partner's double in this auction is a clear call for you to lead the suit he has bid. The fact that you hold a singleton must not dissuade you.
18
After drawing trumps and playing a third diamond (to see if the opponents' plays afford a clue to an unusual distribution) cash the ace and king of spades. If the queen does not drop, take the club finesse. The chance of a successful club finesse is equal to the chance of a successful spade finesse. Adding the possibility of dropping the spade queen is an extra that will eliminate the need for taking any finesse about one time in three. 5 points.
For any play that attempts to get a count on the opponents' distribution before deciding which way to finesse the hearts, being in a generous mood, I will award 2 points.
PHOTO
RATE YOURSELF
82-90: EXPERT
72-81: TOP RANK
54-71: GOOD
36-53: AVERAGE
UNDER 36: DON'T PLAY FOR MONEY