
The Art of Fishing with the Wet Fly
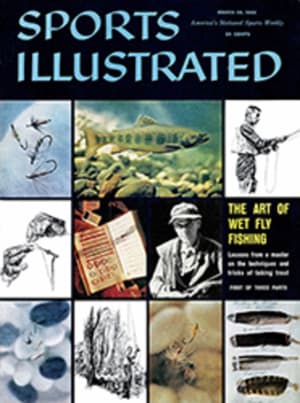

Trout fisherman James Leisenring's life was a bachelor's odyssey that took him from his Delaware Valley home to the more primitive waters tumbling out of the Rockies and the Sierra. East and West, anglers remember him fondly: a tall, bronzed man with piercing brown eyes sensitive to all that was happening in and along a stream. He could shoot a Quill Gordon upstream with a flick of his rod or bring it alive with shorter casts along the bank under the hemlocks. Most of the time, when the wiser trout would not rise to a dry, he would knot on a jewel-small wet fly with the bewitching qualities of a swimming nymph or insect. Maneuvering it ever so carefully, he could make the fly become deadly, as if bringing some magic out of feathers and fur.
Even 30 years ago, when the dry fly was the overwhelming choice among experts, the wet fly was Leisenring's favorite. It enabled him to fish a great deal more water, imitate a wider range of insect life and thus deceive more trout. A nimble-fingered fly tier and a strategist solidly grounded in stream ecology, he combined in some of his flies the subtle colors and qualities of nymph forms of insects. Then, after studying their clambering, crawling behavior under water, he devised a technique that imitated their trout-teasing struggle up through the water to the surface as they were hatching. Here was a golden moment, Leisenring found, to hook trout, since they naturally feed beneath the surface most of the time.
In addition to one small book on the specifics of fly-tying, Leisenring left behind a bounty of unpublished wisdom, some of it in letters and notes, but most of it demonstrated on streams and lakes to such friends as Vernon Hidy of Portland, Oregon, an excellent angler in his own right. It is from Leisenring's notes and lessons learned at streamside that this three-part course in the art of wet-fly fishing derives. Part One is concerned with the fundamentals of casting and the tackle advocated by Leisenring. In subsequent issues, Hidy applies the strategy evolved by Leisenring to conditions found on various types of water and shows the methods Leisenring used to tie the small wet flies that trout relish.
For any skeptic who feels that some facet of Leisenring's technique is no more than whim or eccentricity, this course is based on one simple truth: it has been trout-tested. The only critics Leisenring respected in his 60 years of intensive angling were the trout; the judges whose opinions he valued most were the leaping rainbows and the sullen browns fighting downstream, hook in jaw.
Learning to Cast
As in most forms of angling, the first essential of wet-fly fishing is competent casting. Though obvious to anyone who has done any sort of fresh-water casting, it is worth stating here that accuracy rather than distance is the initial goal. Distance will come in time. Meanwhile, the wet-fly novice who masters accurate casts of 35 feet will take fish on almost any stream. When you first attempt the basic overhead cast (pages 54-55), you will go through the motions in a simple, mechanical way. Gradually your casts will become a graceful, rhythmic, fluid action executed subconsciously, much as a sports car driver shifts gears by "feel," unmindful of the mechanics involved. To carry the analogy a step further, your choice of fly rod is as purposeful a decision as his choice of car is for a driver: your rod commits you to a certain action and style.
A fly rod with stiff action is usually the choice of the dry-fly man, who prefers heavy line enabling him to cast greater distances. A softer-action rod, because of the smoothness and evenness of the action and the sensitivity inherent in it, is traditionally preferred by anglers fishing the delicate wet fly. If your aim is to take fish and, like Leisenring, you want one rod that will be suitable for a variety of conditions, you will compromise by selecting one of medium action. With such a sensitive yet powerful all-purpose rod, you can cast a dry or a wet fly by merely changing the fly and the leader connecting it to the line. Medium-action rods from seven to nine feet long are available in either bamboo or glass. Where do you plan to fish? For small streams, where distance is secondary to accuracy, the shorter, lighter rod is preferable, affording you a maximum of sport. On large streams and lakes, where distance is often necessary, the longer rod is preferable because of its greater power.
In the choice between manually operated and automatic reels, the simpler, manual, narrow-frame reel is perhaps preferable. The automatic reel retrieves line at the touch of a finger, and some anglers want this time-saving feature when fishing big water. Whichever you choose, your reel should not be so heavy that you notice its weight while casting, yet large enough to hold casting line and 50 yards of backing line for playing large fish.
Although there is a detailed analysis of lines and leaders farther along in this article (page 59), a brief discussion is nevertheless in order here since, when you first try the overhead cast on a lawn, you should select a line that works well with your rod. Of the three types of lines used in wet-fly fishing, double-tapered line is unquestionably the best for all-round effectiveness. Double-tapered line starts with a small diameter at one end, gradually increases thickness to a midsection of larger diameter, then tapers off again at the other end. Only one tapered end and the level midsection serve in a cast—when the casting end becomes worn, reverse the line and use the other end.
Double-tapered lines come in a variety of thicknesses and, in general, the thicker, heavier lines are easier to cast. But here, since the only critic that counts is the trout, a compromise is necessary. From the trout's point of view, a fine, light line is better. It touches and enters the water with a minimum of disturbance, is itself less noticeable in the water and casts less shadow on the bottom. From his vast experience, Leisenring came to know that all such disturbances may register on the trout's radar. The popular HDH gauge line calipering .045 inch in the midsection and tapered to .025 inch at the ends is easy to cast, but Leisenring preferred a lighter line tapering from .035 inch to .020 inch. The leaders today, of gut, nylon or platyl, are tapered, the smallest diameter being the end section, or tippet, to which the fly is attached. Again, deferring to the sensitivity of the trout, Leisenring recommended a light leader, eight or nine feet long, tapering from .013 to .006 inch at the tippet.
Just because stylists like Leisenring lay down exacting requirements for equipment, you need not infer that either you or the equipment must be perfection itself before you will take fish. It is reassuring to know that experts stress the importance of short, accurate casts—such as you will first learn—as the best way, by and large, to take fish. Leisenring believed that the angler should make as short a cast as the situation permits, not only to maintain accuracy but to enable the fly to touch the water before the leader and to minimize slack in the line. Some experts have maintained that the moment when a fly touches is the only moment at which a trout will take an artificial fly for a live one. Leisenring disagreed heartily with this; in his long life on streams he amply proved there are other important moments. In subsequent installments we will cover the techniques Leisenring evolved to create such moments. For the present, your first step is to take rod in hand, as shown directly below, and practice the cast demonstrated on the next two pages.
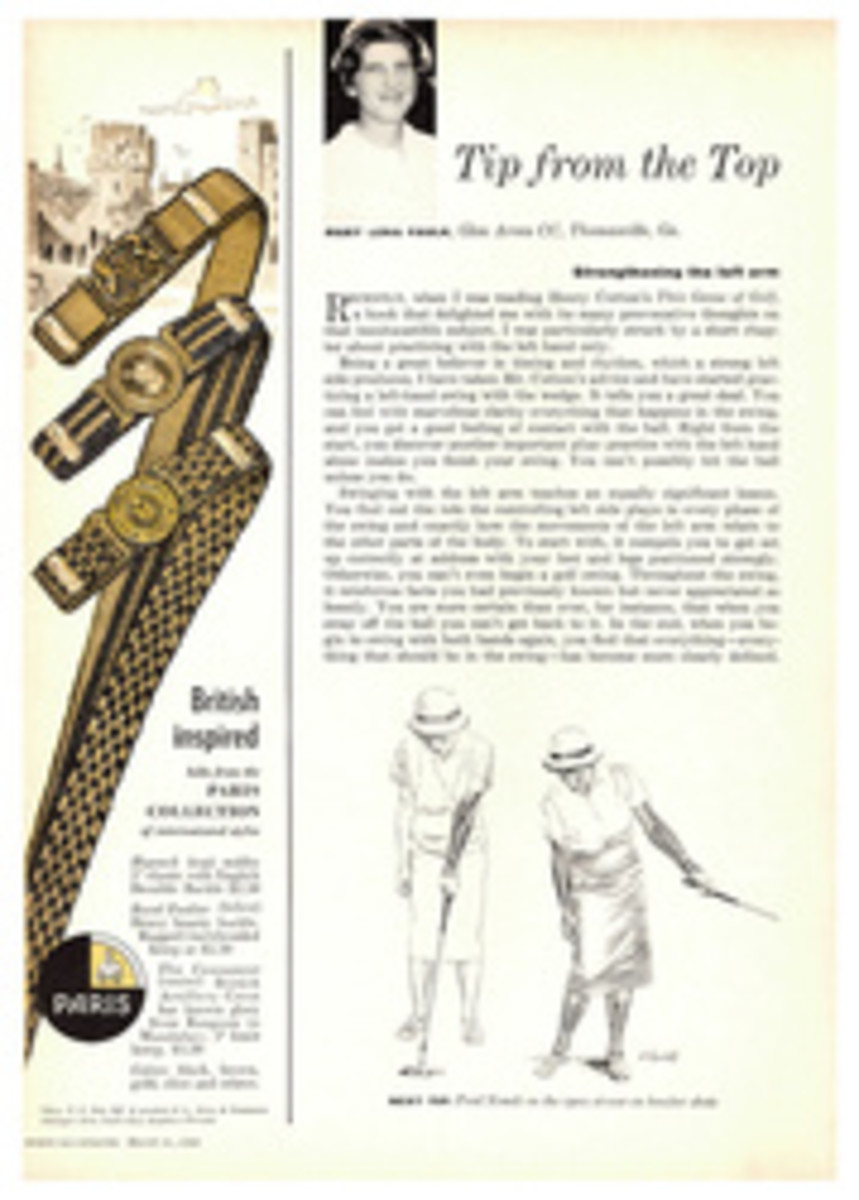
The Grip
To achieve a proper grip for casting, lay the rod handle, holding palm up, across the second joints of the fingers and close the hand. Then, rotating the wrist until the hand is in the position shown in the drawings above and below, press the thumb down on the handle. Be sure to keep thumb on top; its placement is essential in melding your action to that of the rod. Notice that the rod is gripped so that the reel extends below the hand in a vertical plane.
Position of the opposite hand (that is, the left hand of a right-handed caster) is also important; the angler constantly uses it to increase or decrease the amount of line in the air, on the water or in the water. This hand is also used to retrieve line when maneuvering a wet fly. As you start the overhead cast, the line should be hanging in a slack loop, held by the opposite hand at waist level, as shown in the drawing above. Now turn the page to start learning the basic movements of the overhead cast.
To start, strip out 15 or 20 feet of line through the rod guides and lay it out straight on a lawn. Then, gripping the rod and holding a slack loop of line with your opposite hand as you learned on the preceding Page, you face in the direction of the line running across the lawn. At the start of the cast you should be holding the fly rod in such a way that the tip is raised slightly above a line parallel to the ground.
The Overhead Cast
The Overhead Cast is the first one you learn because it is the method of presenting a fly that you will use most often. Moreover, it embodies the same basic principles as the sidearm cast and the forward part of the roll cast, which you will learn later. Many experts used to cast with the elbow pressed against the side, most of the power stemming from the wrist. The modern technique advocated here, however, involving freer action of the whole arm, gives greater accuracy and is less tiring to the wrist. The arm, wrist and hand move much as they would if you were hammering a nail, with wrist movement minimized to maintain control of the rod and preserve accuracy. When actually presenting a fly to the water, you execute the complete action shown in sequence on these pages. To feed out more line or to dry a fly you will often "false-cast." This involves following the action through the fourth illustration of this sequence but beginning a second backcast just before the fly touches the water. If you are lengthening line, in the forward part of each false cast you release some or all of the line you have been holding in your opposite hand.
Slowly raise the rod by lifting the upper arm and at the same time bending the elbow to bring the forearm toward your face. At this point the opposite hand holds the line securely so that no slack line slips through the guides as you raise the rod. Above this illustration and each subsequent illustration in this action sequence, Artist Ravielli has diagramed the lively, whiplike action of the rod and the flowing course your line will follow through the air when you learn to execute the actions reasonably well.
Third step in the overhead cast is to lift the line up off the ground. As you slowly raise the rod, when your forearm and rod are at an angle of about 45° to the ground (shadow outline), give a smart lift and then immediately stop when forearm is nearly vertical. If you do this smoothly, the line will rise from the ground and move up and back. As the line continues backward, relax the wrist somewhat so that the rod drifts backward slightly. You will feel a tug as the line straightens out behind you.
Forward part of the cast begins as soon as the line straightens out behind. The instant this happens, slowly start to lower the upper arm while pushing forward with the forearm. Through the flection of the rod you will feel that you are pulling the line forward. As the movement continues, the rod enters the power zone. When your arm and rod approach the 45° position, push hard with your thumb and wrist. This causes the upper part of the rod to drive the line forward in a very tight loop.
As line straightens out in front of you, release the slack line held by your other hand and the momentum pulls it forward through the guides. As the line shoots through the guides, your rod should be back at starting position. As the line falls, raise the rod tip slightly. This will not only put the fly down better, but the slight angle gives you a margin of safety: the flection of the rod cushions the shock if a trout hits immediately. A fish with a direct pull on the line very likely will break the tippet.
The Sidearm Cast
Often trees or high banks or other obstructions along a stream prevent you from executing the back part of an overhead cast. In such cases, where there is clearance to the side, you can cast sidearm so that the line travels over the water in a horizontal plane, rather than vertically overhead. In side-arm casts you forfeit some accuracy and distance, but you can usually maneuver into a position which will allow you to present the fly in likely spots to take fish. In some cases, even when there is overhead clearance behind you, the sidearm is the only way of getting a fly under brushy overhang and other inaccessible places favored by trout and too often ignored by casual anglers. In steep canyons, too, when the wind is running strong, sidearm casts can help you.
Grip for the sidearm cast is similar to that for overhead casting, except that your rod and hand are rotated about 90°. Thus, the thumb is no longer on top but to the outside, lying in the plane of the horizontal, sweeping action you are about to perform. As the hand is rotated to effect this position, the reel now lies nearly horizontal. Discounting the slight effect gravity has on a line moving horizontally, the course of your line in the horizontal plane when you cast sidearm is identical to the course of the line in the vertical plane when you cast overhead. You can begin learning the sidearm cast on a lawn or on a stream. If you start on a stream you should first try it in an open area, where you can pay out some line first with overhead casts. Then, when you have the sidearm cast learned at least mechanically, you can try it in an obstructed area, where a good deal more finesse will be required.
At the start, you face the direction in which you intend to cast, with the casting arm extended but not straight or stiff. Your upper arm should be sloping down at an angle of about 45°, the forearm and rod extended and slanting up a few degrees from horizontal. If you are a right-hander your rod and forearm should be pointing a little to the right of the direction in which you intend to cast.
In the sidearm cast, as shown below in Ravielli's drawing looking straight down on the caster, you swing your arm back until your forearm and rod reach a point roughly at right angles to the starting position. As you start this backward sweep, your wrist should be stiff so that forearm and rod move as a unit. But about midway in the sweep back, you flex your wrist to the rear to power the line backward. When the line straightens out behind you—you will feel the tug on the rod—begin the forward cast, sweeping arm and rod back toward the starting position. In the first part of the return arc, the wrist remains flexed rearward. About midway, by straightening the wrist and pressing with your thumb, you shove the rod forward. This action, as in the overhead cast, will cause the rod tip to flip the line in a tight loop toward the intended target.
Lines, Leaders and Knots
If you care to, you can begin learning the sidearm cast demonstrated on the preceding page on a stream or pond rather than a lawn. In any case, the third cast in your repertoire, the roll cast shown on the following pages, can best be learned on a stream. There you will need to know how to tie the knots joining line, leader and fly. So here, before you reach the water, are some facts to guide you.
Lines
Of the three types of line available, in our discussion of basic equipment earlier we recommended double-tapered line as the best for general use. There is another, cheaper type of line known as level line, which, as the name implies, has no taper. The most that can be said for level line is that it will do in various situations but is not really good for any. The third type, torpedo-head line, is a tapered line with a thick, heavy section near the forward end, which pulls the rest of the line through the guides more readily. Designed for distance, the torpedo head will cast accurately but with less finesse than the more delicate double taper.
Line thicknesses are usually not specified in thousandths of an inch but by letters of the alphabet designating specific thicknesses, thus:
B=.055 inch
C=.050 inch
D=.045 inch
E=.040 inch
F=.035 inch
G=.030 inch
H=.025 inch
I=.020 inch
Applying this alphabetical gauge to Leisenring's choice of line—.035 in midsection tapering to .020 at each end—the thickness would be F in the midsection, tapering to I at each end, and the total designation of the line would be IFI. In general, the makeup of the various types of lines used in wet-fly fishing is as shown in compressed form in the diagram here.
Leaders
As with line, more delicacy of presentation is achieved with a tapered rather than with a level leader. The thicker end of a tapered leader is connected to the line; the smaller end, the tippet, is tied to the fly. Today such synthetics as nylon and platyl come in knotless, tapered lengths. These serve well, but some very experienced anglers still like traditional gut: it seems to cast better and it does sink better. And although knotless, tapered leaders are now available, many prefer knotted leaders made up of 10- or 12-inch lengths of different thicknesses, tied in diminishing sequence to achieve a taper. Leader material varies in thickness and also in strength. Thicknesses are designated as 2x, 3x, 4x and so forth, with "x" equaling .010 inch, 1x equaling .009 inch, 2x equaling .008 inch, and so on.
Leisenring preferred gut, eight or nine feet long, tapering to a 3x or 4x tippet.
Knots
Of the variety of knots that anglers use, those illustrated below will do the whole job of combining all of the essential elements as you normally will use them.
Perfection loop: With this loop tied in the end of the leader, you will need only a simple jam knot to connect leader to line. Loop should be about½ inch in diameter.
Jam knot: Here is a simple, fast and reliable way of connecting the line to the perfection loop tied in the end of the leader.
Blood knot: Used to join sections of level leader material of varying thicknesses in diminishing order for a tapered leader.
Turle knot: Used to connect the leader tippet to the fly. In using gut, the knot is tied as it is shown here; but with platyl or nylon, in order to prevent any slipping, tuck the end back through loop once more before drawing the knot tight.
The Roll Cast
The Roll Cast is a particular necessity when trees or other obstructions do not give you clearance for either overhead or sidearm casts. It can also be useful in placing a fly at a point directly upwind from the fisherman. Beyond these obvious values, there are others: there is a minimum of arm and rod movement to telegraph your presence to the fish, and the film of water on fly and leader is less disturbed by the roll cast, so that both sink more cleanly as they are put down on the surface. Also, when fishing deep, often you tempt fish by causing your fly to rise. You do this by raising your rod vertically, and from this position the most convenient cast is another roll cast. For other reasons equally important, which we will cover in discussing stream strategy in the next issue, the roll cast, although not so accurate as other casts, nor as good for distance, is a valuable part of your casting repertoire. In the roll cast, as the name implies and the diagrams below indicate, you draw the line toward you as you raise your rod. Then with a sudden motion of the arm you roll the line back out over the water. While you can start learning the overhead and sidearm casts on a lawn, you should start trying the roll cast on a stream or, better yet, on a still pond, where the smooth, even resistance of the water against the line helps achieve a satisfactory cast.
As you begin the roll cast, the wrist is held stiff, as in the overhead, so that forearm and rod are a single working unit. At the start of a cast, lift the rod by raising your upper arm and forearm as shown in the drawing below. You carry this motion on through at a slow speed until the forearm and rod are overhead and actually inclining slightly to the rear. At this point you should make a definite pause, so the line which has been pulled toward you through the water now hangs slack near your side. The wrist should remain slightly relaxed.
For the roll cast you take the same grip on the rod as for the overhead cast. Start with about 20 feet of line on the water at your feet, preferably on the side of your casting arm. Keep a little line slack—three or four feet of it—between your other hand and the reel, as shown in the drawing above. From this simple beginning you can make casts of up to 50 feet, following the sequence of action explained here, using the other hand to strip out more line from the reel at the completion of each cast.
Forward movement of the cast is started by lowering the upper arm suddenly while pushing forward with the forearm. Give a thrust with the thumb as the arm moves forward, as in the overhead cast, so that the rod tip will flip the line into a curling loop which will roll out over the water. The rod and line action for the start of the forward cast are diagramed at left. Final movements of rod and line are above.
PHOTO
RICHARD JEFFEREY
ORIGINAL BOOK OF COLOR-CODED FLY-TYING MATERIALS USED BY MASTER ANGLER LEISENRING
PHOTO
ANGLER JAMES LEISENRING (1878-1951)
PHOTO
ANTHONY RAVIELLI
PHOTO
VERNON S. HIDY
PHOTO
JOHNNY DIECKMAN
TWENTY ONE ILLUSTRATIONS
DIAGRAM
Lines
Level
Double tapered
Torpedo head
30 yards
DIAGRAM
Leaders
Level
Tapered
Knotted tapered
Nine feet
Next Week: Stream Strategy
The three basic casts you have learned will serve you well in solving a variety of stream problems. But where do you find trout in these streams? And when you know where the trout may be, how do you gain the narrow advantages that are often the difference between spooking and tempting a trout? Next week we present the lessons in stream strategy as James Leisenring learned them in a lifetime of fishing.