

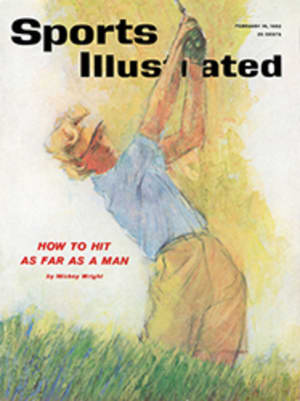
ANYONE CAN HIT A LONG BALL

For the weekend golfer a good driving round will be a good scoring round, since a long, straight tee shot usually will bring the green within reach and create a good chance for a par or even a birdie. Most golfers, however, have never really tried to learn how to hit for distance. Women in particular think that they do not have the necessary size or strength. Not true, says U.S. Open Champion Mickey Wright, who has become the longest hitter in the history of women's golf by incorporating into her swing seven distance-building elements. She guarantees that anyone of normal size and coordination, whether man or woman, can learn to drive a golf ball consistently 200 yards or more. On the following pages Miss Wright teaches the seven vital elements in seven simple steps. Once studied and mastered, they will make it easy for anyone to achieve the distance off the tee that is so essential for winning golf today.
STEP 1: The grip
There are two important points to keep in mind about the grip. First, it should be natural. By this I mean the position of your left hand on the club should be more or less the same as its position when your left arm is hanging loosely at your side. This is absolutely the strongest position it can be in, but I learned this the hard way. In 1960 in order to develop a soft, controlled fade I weakened my left-hand grip by moving my thumb over onto the top of the shaft. After a few months I began to feel a strong and persistent pain in my shoulder, which left only after Earl Stewart, the Dallas pro, persuaded me to return to my natural grip. "You are probably forcing too hard to get the club face back on line," he pointed out.
Just as important as the position of the left hand is the placement of the right index finger. This finger should be around the shaft slightly apart from the middle finger (see above), just as it would be if you were set to squeeze the trigger of a rifle. This position is especially important for women. It helps tremendously in keeping the club face square at the start of the backswing and it supplies a much stronger hold on the club at the top of the backswing than a grip that doesn't emphasize this trigger-finger action of the right index finger.
Suggested practice routine: Practice for a minute or so daily just putting your hands on the club in the correct manner. Check the trigger finger closely. Then keep rechecking against the drawings (left and above) until the grip becomes automatic. Recheck again frequently.
STEP 2: The stance
The right foot is the key to a strong stance. It is both a buttress around which you will build a great deal of your swing and a starting block from which you can accelerate into the shot quickly and smoothly. The rest of the stance is pretty routine, but I'll go over it briefly. Play the ball opposite the instep of your left foot with your weight distributed over the rear portion of both feet, from the balls of the feet back through the heels. No weight should be on the toes. At address your arms should be firm but not rigid, neither pressed in against the body nor reaching out for the ball. You will lose a great deal of distance if you have to reach. The sole of your driver should be flat on the ground. When it is, you know you are handling the club the way it was designed to be used.
To produce extra distance you must learn to use the right foot efficiently. The weight planted on the right foot should be carried entirely along the instep. The right knee should be braced inward so that you can feel tension all up and down the inside of the calf and thigh, as if you were holding a volleyball against your left leg with the right knee. Bracing your right foot and leg in this manner will keep the leg from buckling during the backswing and thus prevent a left-to-right sway. It will also furnish a powerful jumping-off place from which to start the downswing. To reproduce exactly what I want in this respect I often hit practice shots with a golf ball tucked under the outside spikes of my right shoe (see drawing). The immediate increase in distance using this gimmick is astonishing.
Suggested practice routine: Spend at least 15 minutes each week hitting shots with a golf ball placed under the outer edge of your right shoe. This will also help improve footwork.
STEP 3: The wide-arc swing
A swing with a wide arc will give you more opportunity to build up clubhead speed without hurrying the swing. To achieve this wide arc it is vital to start the backswing correctly. I start mine by taking the clubhead straight back from the ball and low along the ground for a distance of about a foot, at which time the turn of the body will naturally bring the club to the inside of the line. This low, straight takeaway sets the mood for the entire swing. To get this takeaway firmly implanted in your mind during practice, place a tee in the ground 12 inches behind the ball. A correct backswing will knock down the tee.
The rest of the wide-arc swing should follow almost as a matter of course. You should not consciously cock your wrists at any time. In fact, you should not be thinking about your hands or arms during the entire backswing. I keep the inside of my left elbow facing straight up as the club starts back. This helps to keep the club face on line as long as possible and it helps keep the right elbow in front of the right hip. Once the right elbow starts getting outside or behind the right hip it means that you are swinging the club back with your arms alone—and too fast—rather than allowing the weight to shift and the hips, shoulders and arms to turn in unison. At the top of the swing you should have rotated your hips about 45° from their position at address, your shoulders about 90°. The turning of the hips and the shoulders, combined with the clubhead's own momentum, automatically send the clubhead to the top of the swing. This natural, one-piece motion will guarantee a wide-arc swing and will promote a smooth, gradually accelerating backswing and downswing, an essential item when you want distance.
Suggested practice routine: Twice a week take 10 swings with a tee placed in the ground. Then hit at least 10 drives while thinking of nothing but the low, straight takeaway.
STEP 4: The right elbow at the top
Bringing your right elbow into the correct position at the peak of the backswing may be the most valuable step to master. When you learn it you will be taking a giant step toward being able to swing the club as hard as possible without destroying the groove or the rhythm of your swing. At the top of the swing the right elbow should point directly toward the ground and the right hand should be directly under the shaft of the club, its edge pointing up. One way to help remember this position is to swing the club to the top and then, making sure your left arm is straight, attempt to press your two forearms together. The right elbow position is crucial for two reasons: 1) anticipating getting the right elbow into this posture will make it much easier to produce a one-piece back-swing; 2) on the downswing you will find it easier to bring your right elbow down in front of your right hip, a point I'll discuss in Step 5.
While getting your right elbow into the correct position at the top should be an easy enough move to visualize, it may prove quite difficult to perfect. It is hard to resist letting the elbow fly out. But with practice this step should start to become natural within a few weeks.
Suggested practice routine: Take six swings in front of a mirror three times a day, getting your right elbow into the correct position and keeping your left-hand grip firm. This will also strengthen the key muscles.
STEP 5: The right elbow on the downswing
If your right elbow is in the correct position at the top of the swing (Step 4), the proper downswing will follow automatically as soon as you shift your weight off the right foot and onto the left (see Step 6). Most women uncock, the hands too soon because they are not strong enough to delay this. But with the right elbow pointing straight down it is almost impossible to make this error. When you have started your downswing correctly, the right elbow should work down in front of the right hip. This is crucial. The move will properly delay the uncocking of the hands and bring the club down on the desirable inside arc and the clubhead into the ball from straight behind. You will be able to swing hard without a resulting loss of club control. Once the elbow gets behind the hip on the downswing, the result is often a slice and a disheartening loss of distance.
Suggested practice routine: For a minute or so each day, starting from the correct position at top of the swing, stand in front of a mirror and practice 1) bringing the right elbow down in front of the hip properly and 2) keeping the hands fully cocked as long as possible.
STEP 6: Footwork
Where distance is concerned, the force exerted by the right foot is critical. The weight planted on the right foot should be carried along the instep (1). As you sweep the club back you should gradually and consciously push your weight off the left foot and onto the instep of the right (2). The right foot and leg, in fact, should act like a buttress, resisting the pressure of the backswing, and the right leg should maintain pretty much the same position that it held at address. Also keep this in mind about the left foot: as the weight is transferred to the right foot, the left should roll over sideways, onto the instep. If the left heel is lifted too high, or even if it remains planted on the ground, too much weight will tend to remain on the left foot. At the top of the backswing (3), most of your weight should be felt along the right instep and along the inside of the right calf and thigh.
You start the downswing by pushing your weight off the right foot and onto the left (4). The hips will turn almost simultaneously, but there should be no violent pivoting action. Initiating the downswing by turning the hips—the popular method—too often leaves the right elbow behind the hip. This throws the clubhead into an outside-in arc and is likely to produce a slice.
Suggested practice routine: Spend five minutes a day swinging your driver back and forth, concentrating on footwork. Hit at least 15 shots with your driver each time you practice, concentrating entirely on this weight shift.
STEP 7: The head behind the ball at impact
It is not exactly revolutionary to state that you should keep your head behind the ball throughout the swing and at impact. But it is still an important point to stress, because failure to do so will drain off all the power, rhythm and momentum built up by the first six steps. You must feel from the very start of the downswing that your head is remaining behind the ball, that you are looking at the back of the ball when it is hit. Thus, though your weight will be moving over to the left side, your right shoulder will be under your left shoulder and in perfect position to keep the explosive hitting force you have produced behind the ball where it belongs. If your head has slid to the left of the ball before or at impact, this means that your shoulders have also moved to the left. The movement can produce only two results, both bad. First of all, your hands also will have moved ahead of the ball. The clubhead, accordingly, will not have reached its maximum speed at impact. What little power remains will be applied downward instead of through and toward the target. Second, hitting at the ball from in front of it, instead of from behind it, will open the face of the club at impact, with the obvious result that the shot will be pushed to the right or, worse, will result in a slice.
Suggested practice routine: Spend 10 minutes of every practice session drilling on keeping your head steady. Ask an observer to tell you each time whether you have succeeded.
SUMMARY
In explaining how it is possible to increase dramatically the distance of your drives, I have made no attempt to describe all the basic fundamentals of the golf swing. I have sought only to isolate and clarify the areas in the swing from which distance hitting springs. There are other factors that will help, too. Ball games—tennis, paddle tennis, ping-pong, etc.—are good for your timing, because they accustom you to the act of striking a ball. Pitching or chipping a golf ball around the backyard also helps in this respect. So will exercises with hand grippers and dumbbells. With them you can increase your hand and arm strength. A woman, fortunately, can do a good many strength exercises before they begin to have any effect on the shape of her arm muscles. If you are a weekend golfer, by merely handling, swinging and feeling the weight of a club every day you will help your game. If you should go further and master even two or three of the seven steps I have described on the preceding pages, you are bound to improve. When you have incorporated all seven into your swing, the result in longer drives and lower scores is likely to be astonishing.
PHOTO
TWO ILLUSTRATIONS
FRANK MULLINS
When her left hand hangs limp at her side before gripping the club (left), Mickey Wright's thumb is turned slightly to her right. This is its strongest position and it remains there when she grips the club, thus contributing to distance and accuracy.
ILLUSTRATION
FRANK MULLINS
ILLUSTRATION
FRANK MULLINS
At address (right). Miss Wright's arms are held firm hut not rigid, with most of her weight carried on rear portion of the feet.
ILLUSTRATION
FRANK MULLINS
The right knee is braced to ward left so that muscular tension (shaded area) is fell on instep of right foot and inside both legs.
ILLUSTRATION
FRANK MULLINS
Ball (arrow) placed under the shoe just inside the outer row of spikes will force weight to fall correctly on right instep.
ILLUSTRATION
FRANK MULLINS
A wooden tee (arrow), placed in ground 12 inches behind the ball, will be knocked over by a correct takeaway which will set up the entire one-piece wide-arc swing.
ILLUSTRATION
FRANK MULLINS
At top of backswing Miss Wright's right elbow resists impulse to fly out (dotted line), points straight toward ground, fleshy edge of the right hand points up.
ILLUSTRATION
FRANK MULLINS
Miss Wright's elbow (circle) comes down in front of the hip, correctly delays uncocking of hands, keeps club on inside arc.
ILLUSTRATION
FRANK MULLINS
1
ILLUSTRATION
FRANK MULLINS
2
ILLUSTRATION
FRANK MULLINS
3
ILLUSTRATION
FRANK MULLINS
4
ILLUSTRATION
FRANK MULLINS
Miss Wright's follow-through indicates how force (arrows) is applied. Hips, legs shift to left; head, shoulders stay behind ball (cross). Hitting power goes through and to ward target.